
by cafe-eilat | Apr 21, 2026 | Restaurants
Imagine wandering through sun-drenched villages where the scent of cocoa mingles with the aroma of freshly baked pastries, where every chocolatier's window display promises a taste of something utterly sublime. The south-west of France, a region celebrated for its rolling vineyards, hearty cuisine, and pastoral charm, also harbours a lesser-known treasure trove for those with a passion for fine chocolate. Here, artisan chocolatiers craft confections that speak of tradition, innovation, and a deep respect for local produce. This is not merely about indulging a sweet tooth; it is about embarking on a gourmet adventure that unveils the soul of a region through its most delectable offerings.
Discovering the Artisan Chocolatiers of South-West France
The south-western corner of France is home to a network of small-scale chocolatiers whose dedication to their craft rivals that of the finest winemakers. These ateliers, often tucked away in charming market towns or nestled in the countryside, operate with a philosophy that values quality over quantity. Many are family-run enterprises, where recipes and techniques have been passed down through generations, creating a sense of continuity and authenticity that is increasingly rare in our modern world. Walking into one of these workshops feels like stepping back in time, where the rhythmic sound of chocolate being tempered and the rich, heady aroma of cocoa envelop you in a sensory embrace.
Family-run ateliers and time-honoured techniques
What sets these artisan chocolatiers apart is their unwavering commitment to traditional methods. In an age where mass production dominates, these craftspeople still hand-pour, hand-mould, and hand-decorate each piece with meticulous care. The result is chocolate that is not only visually stunning but also possesses a depth of flavour that speaks to the skill and patience invested in its creation. Many of these ateliers open their doors to visitors, offering workshops and tasting sessions that provide an intimate glimpse into the chocolate-making process. Here, you can witness the transformation of raw cocoa into glossy ganaches, delicate pralines, and velvety truffles, all while learning about the science and artistry that underpin this ancient craft. The experience is both educational and utterly enchanting, leaving you with a newfound appreciation for the complexity behind every bite.
The regional ingredients that define authentic south-western chocolate
The true magic of south-western chocolate lies in its connection to the land. Chocolatiers in this region do not simply rely on imported cocoa; they celebrate the bounty of their own terroir by incorporating locally sourced ingredients into their creations. From the luscious prunes of Agen to the robust notes of Armagnac, each ingredient tells a story of the region's agricultural heritage. The use of fresh cream from nearby dairies, honey harvested from local apiaries, and nuts grown in surrounding orchards ensures that every chocolate carries a distinct sense of place. This dedication to regional produce not only enhances the flavour profile but also supports local farmers and producers, creating a sustainable and interconnected food economy that benefits the entire community.
A tasting journey through south-western chocolate specialities
Embarking on a tasting journey through the south-west is akin to exploring a culinary map where each chocolatier offers a unique interpretation of tradition and innovation. The diversity of flavours available is staggering, ranging from classic dark chocolate ganaches to more adventurous combinations that challenge the palate in the most delightful ways. As you sample your way through these offerings, you begin to understand how the region's history, culture, and natural resources converge to create something truly extraordinary. Each chocolate is a miniature work of art, a testament to the skill and creativity of its maker, and a celebration of the ingredients that make the south-west of France such a gastronomic paradise.

Signature Flavours: From Prune d'Agen to Armagnac Infusions
Among the standout specialities of the region are chocolates infused with prune d'Agen, a fruit that has been cultivated in the area for centuries and is renowned for its sweet, honeyed flavour. When paired with rich, dark chocolate, the prune's natural sugars and subtle tartness create a harmonious balance that is both comforting and sophisticated. Equally captivating are the Armagnac-infused chocolates, where the fiery spirit is mellowed by the cocoa, resulting in a confection that is warm, aromatic, and utterly addictive. These signature flavours are not mere novelties; they are expressions of regional identity, capturing the essence of the south-west in every bite. Many chocolatiers also experiment with other local ingredients such as walnut, hazelnut, and even duck foie gras, pushing the boundaries of what chocolate can be while remaining rooted in tradition.
Seasonal treasures and limited edition creations
Part of the allure of visiting these chocolatiers is the opportunity to discover seasonal treasures and limited edition creations that are available only at certain times of the year. During the autumn months, for instance, you might find chocolates featuring freshly harvested chestnuts or wild mushrooms, while spring brings delicate floral infusions and fresh berry ganaches. These limited runs are often produced in small batches, making them highly sought after by collectors and connoisseurs alike. The ever-changing selection ensures that each visit offers something new and unexpected, encouraging you to return time and again to see what the chocolatiers have dreamed up next. This sense of anticipation and discovery is a key part of the gourmet adventure, transforming a simple chocolate purchase into a memorable experience.
Planning your chocolate-fuelled gourmet adventure
For those ready to embark on this delicious journey, a bit of planning can enhance the experience manifold. The south-west of France is a sprawling region, and while it is possible to stumble upon a hidden gem by chance, a well-thought-out itinerary ensures that you make the most of your time and savour the very best the region has to offer. Whether you are a seasoned chocolate aficionado or a curious traveller eager to explore new tastes, there are countless opportunities to immerse yourself in the world of artisan chocolate, from guided tours and hands-on workshops to leisurely tastings and personalised consultations with master chocolatiers.
Must-visit chocolatier workshops and tasting experiences
Several chocolatiers in the region offer immersive workshops where you can learn the fundamentals of chocolate making under the guidance of experienced artisans. These sessions typically cover everything from tempering and moulding to flavour pairing and decoration, providing a comprehensive introduction to the craft. Many workshops also include a tasting component, allowing you to sample a variety of chocolates and develop a more refined palate. For those who prefer a less hands-on approach, tasting experiences are available where you can sit back and savour a curated selection of chocolates while learning about their creation and the stories behind each flavour. These experiences are often intimate, with small groups ensuring that you receive personalised attention and have ample opportunity to ask questions and engage with the chocolatier.
Selecting the Perfect Edible Souvenirs and Gift Hampers
No gourmet adventure would be complete without bringing home a selection of edible souvenirs to share with friends and family or to savour in the quiet moments after your trip. The chocolatiers of the south-west excel at creating beautifully packaged gift hampers that showcase the best of their offerings. These hampers often include a mix of signature flavours, seasonal specialities, and limited edition creations, all presented in elegant boxes or rustic baskets that reflect the charm of the region. When selecting your souvenirs, consider opting for a variety of flavours and textures to give recipients a true taste of the south-west. Many chocolatiers also offer bespoke hampers, allowing you to customise the selection to suit individual tastes and dietary requirements. Whether you choose a single box of exquisite truffles or a lavish hamper brimming with chocolate delights, these edible mementoes will serve as a delicious reminder of your gourmet adventure long after you have returned home.

by cafe-eilat | Apr 21, 2026 | Cooking techniques
The warm months bring with them the irresistible allure of outdoor cooking, yet many enthusiasts find themselves questioning whether traditional firelighters represent the best approach for igniting their charcoal grills. Concerns about chemical exposure, environmental impact, and the subtle flavours imparted by conventional lighting methods have prompted a growing number of barbecue lovers to explore alternatives that align with both culinary excellence and sustainable practices. Fortunately, a wealth of ingenious techniques exists that can transform your outdoor cooking experience whilst reducing reliance on shop-bought products laden with questionable additives.
Natural alternatives for igniting your charcoal barbecue
The chimney starter method: a brilliant solution for eco-conscious grillers
Among the most effective innovations in charcoal lighting methods stands the chimney starter, a cylindrical metal device that harnesses the power of natural convection to create a roaring fire without a single drop of chemical fluid. This remarkable tool operates by placing crumpled newspaper or other combustible material in the compartment beneath the main chamber, which holds your charcoal. Once ignited, the rising heat creates a powerful updraft that spreads flames evenly throughout the coals, typically achieving cooking temperature within twenty to thirty minutes. The beauty of this approach lies in its simplicity and reliability, producing a larger and quicker fire than most alternative methods whilst keeping harmful substances far from your food. For those without a purpose-built chimney, a modified metal can or even a sturdy paper carton can serve as a homemade version, demonstrating that innovation need not come with a hefty price tag.
Newspaper and Kindling: Old-Fashioned Techniques That Still Work a Treat
Long before commercial products dominated the market, generations of outdoor cooks relied upon readily available materials to coax their coals to life. Newspaper remains one of the most accessible options, particularly when enhanced with a light coating of cooking oil to extend its burn time and increase heat output. The technique involves scrunching several sheets into loose balls and positioning them strategically beneath your charcoal arrangement, creating pockets of air that feed the flames as they develop. This method works especially well when combined with small pieces of kindling or dry twigs, which bridge the gap between the initial paper flame and the sustained heat required to ignite larger chunks of charcoal. Those fortunate enough to have access to pine cones will find them particularly valuable, as their resinous composition makes them excellent natural fire starters that burn hot and long enough to transfer heat effectively to surrounding coals.
Household items that make excellent firelighter substitutes
Cooking Oil and Kitchen Roll: Clever Uses for Everyday Materials
Your kitchen cupboards harbour surprisingly effective resources for BBQ without firelighters, with cooking oil and paper towels forming a partnership that rivals many commercial products. The process requires soaking several paper towels in approximately one-third of a cup of olive oil or any cooking oil you have to hand, creating fuel-rich bundles that ignite easily yet burn steadily for sufficient duration to kindle your charcoal. This approach offers particular advantages for those seeking chemical-free lighting options, as it relies upon materials already present in most households and produces no synthetic fumes that might compromise the taste of your carefully prepared food. Similarly, cotton balls soaked in rubbing alcohol provide another household solution, though users must exercise appropriate caution when handling flammable liquids and ensure proper ventilation throughout the lighting process.

Wine Corks and Cardboard Egg Boxes: Unexpected Champions for Getting Your Coals Going
The creative barbecue enthusiast will discover that items destined for the recycling bin can enjoy a second life as effective fire-starting materials. Wine corks, composed of natural cork material, burn slowly and produce substantial heat, making them ideal for placement beneath charcoal arrangements where their sustained combustion can gradually raise coal temperatures to ignition point. Cardboard egg boxes serve a similar function, with their segmented structure allowing you to create individual fire-starting compartments that can be lit sequentially or simultaneously depending upon your needs. For those with access to wooden packaging, even a broken tomato crate can provide enough kindling material to establish a robust fire base, demonstrating that sustainable solutions often emerge from rethinking the potential of everyday objects rather than purchasing specialised products.
Safe and Efficient Techniques for Chemical-Free BBQ Lighting
Proper Airflow and Coal Arrangement: The Foundation of Successful Ignition
Regardless of which alternative fire starters you choose, success ultimately depends upon understanding the fundamental principles of combustion and applying them thoughtfully to your charcoal barbecue setup. Adequate airflow represents perhaps the single most critical factor, as even the most potent ignition source will falter without sufficient oxygen to sustain the flames. Arranging your coals in a pyramid or mound configuration creates natural channels through which air can circulate, whilst ensuring that heat from initial flames can spread efficiently to neighbouring pieces. The temptation to pack charcoal tightly must be resisted, as this restricts oxygen flow and can result in smouldering rather than the vigorous burning required for proper cooking temperatures. Opening vents on your barbecue fully during the lighting phase maximises airflow, accelerating the transition from tentative flames to the robust heat that signals readiness for culinary adventures.
Timing and Temperature Management: Knowing When Your Barbecue is Ready for Cooking
Patience emerges as an essential virtue when employing natural lighting materials, as these methods typically require thirty minutes or more to bring your barbecue to optimal cooking temperature. Visual cues provide reliable indicators of readiness, with coals transitioning from black to grey as they develop the consistent heat distribution necessary for even cooking. A light coating of white ash signals that your charcoal has reached the steady, sustained temperature ideal for most grilling applications, though different dishes may require adjustments to coal quantity or arrangement. When your cooking session concludes, proper extinguishing techniques ensure safety and allow for potential charcoal reuse, with spreading coals thinly and smothering them with ash or a controlled application of water representing the most effective approaches. These sustainable practices not only eliminate dependence on chemical-laden products but also reconnect modern cooks with time-tested techniques that have served outdoor cooking enthusiasts splendidly for generations, proving that sometimes the most effective solutions are those that have stood the test of time.

by cafe-eilat | Apr 19, 2026 | Equipment
When it comes to dressing your windows, the debate between curtains that just kiss the floor and those that pool gracefully upon it is one that divides homeowners and interior designers alike. This choice is far more than a mere detail; it shapes the entire atmosphere of a room, influencing everything from the perceived height of your ceilings to the overall elegance of your space. Whether you favour a crisp, tailored aesthetic or a more romantic, luxurious vibe, understanding the nuances of curtain length can transform your home into a polished sanctuary.
Understanding the two main curtain length styles
The world of window dressings offers a variety of approaches, but when it comes to length, two primary styles dominate the conversation. Each brings its own character and suits different environments, so it is essential to grasp what each entails before making your decision. The choice you make will depend not only on the look you wish to achieve but also on how you use the room and the practicalities of your daily life.
The Kiss or Touch: Clean Lines for Contemporary Spaces
For those who appreciate a neat, modern appearance, curtains that lightly touch the floor are often the preferred option. This style, sometimes referred to as a slight float or break length, involves drapes that either hover just above the floor or gently rest upon it with minimal excess fabric. The result is a crisp, tailored look that exudes a sense of order and sophistication, making it particularly well-suited to contemporary interiors. This approach is smart and tidy, innit, and it helps to create a vertical line that draws the eye upward, making ceilings appear taller and rooms feel more spacious. Many interior designers recommend this length for living and dining rooms where a polished, finished appearance is desired. The slight float, hovering up to one inch above the floor, is ideal for those who want to avoid any fabric touching the ground, while the kiss option, where the hem lightly touches the floor, offers a slightly softer aesthetic without sacrificing the clean lines. This method also ensures that the drapery does not interfere with the floor or collect dust, which can be a practical advantage in homes with pets or young children. The tailored appearance achieved with this style is often seen in global marinas cuisine establishments and high-end boutiques, where every detail contributes to an overall sense of refinement and attention to detail.
The Puddle or Pool: Romantic Elegance for Formal Rooms
On the other end of the spectrum lies the puddle or pool style, where curtains extend well beyond the floor and gather in a luxurious pool of fabric. This romantic, opulent look is a bit posh, really, and it brings a sense of drama and grandeur to any space. Typically involving an excess of between two and six inches of fabric, this style is best reserved for formal rooms such as master bedrooms, grand dining areas, or drawing rooms where a relaxed yet elegant vibe is desired. The pooling effect softens the overall aesthetic and creates a sense of indulgence, as though the room has been dressed with care and attention to every detail. This approach is particularly effective in spaces with high ceilings or large windows, where the extra fabric can balance the proportions and add warmth. However, the puddle length does require more fabric and therefore can be more costly, and it also demands a bit more maintenance. The excess material is prone to collecting dust and may require more frequent cleaning, especially in homes where the floor is regularly vacuated. Despite these considerations, the romantic elegance of pooled curtains remains a favourite among those who wish to make a bold statement and infuse their interiors with a touch of old-world charm.
Practical considerations for your curtain length decision

While aesthetics play a significant role in choosing curtain length, practical considerations are equally important. Your lifestyle, the function of the room, and how often you are willing to maintain your window treatments should all factor into your decision. Balancing visual appeal with everyday functionality ensures that your curtains not only look stunning but also serve your needs effectively.
Maintenance and Cleaning: What Works for Your Lifestyle
One of the most significant practical factors to consider is how much time and effort you are prepared to invest in keeping your curtains clean. Curtains that hover just above the floor or lightly touch it are generally easier to maintain, as they are less likely to accumulate dust, dirt, and pet hair. This slight float or kiss style is ideal for busy households or those who prefer a low-maintenance approach to home décor. In contrast, pooled curtains, while undeniably beautiful, require more frequent hoovering and occasional laundering to keep them looking their best. The excess fabric resting on the floor can trap dust and allergens, which may be a concern for those with respiratory sensitivities or allergies. Additionally, if you have pets or young children, the pooled fabric may be more susceptible to stains and wear over time. It is worth considering how often you fancy hoovering around your curtains and whether the extra effort required for maintaining a puddle length is something you are willing to commit to. For those who value convenience and ease of care, the kiss or slight float option is often the more sensible choice.
Room function and daily usage patterns
The function of the room and how you use it daily should also guide your curtain length decision. In living and dining rooms, where you entertain guests and want to create a polished, cohesive look, floor-length curtains that either kiss the floor or hover just above it are typically the most appropriate. These styles help to elongate the walls, enhance the sense of space, and provide a finished appearance that complements the overall design. In formal settings, where you wish to impress and create a sense of occasion, the puddle length can add a touch of luxury and sophistication. However, in more functional spaces such as kitchens, bathrooms, or children’s rooms, shorter curtains or those that hover above the floor may be more practical. Safety is also a consideration, particularly in rooms with radiators or heating elements, where long drapes could pose a fire hazard. Additionally, in bay windows or areas with unique architectural features, the choice of curtain length can affect the overall harmony of the space. Consistency in rod height, drapery length, fabric, and header style is crucial if multiple windows share a sightline, ensuring that the room feels unified and well-designed. Ultimately, the decision should reflect both your personal style and the practical demands of your daily life, creating a balance that is both beautiful and functional.

by cafe-eilat | Apr 18, 2026 | Equipment
Sometimes the most refreshing thing you can do is step away from the familiar rhythm of city life and immerse yourself in something altogether different. When the tube journeys feel a bit too crowded and the parks a touch too trampled, it might be time to consider venturing further afield. The Spanish countryside offers just the sort of antidote you might be craving, and there is one particular destination that seems to capture the essence of what a genuine rural escape should feel like. If you are wondering where to find that perfect blend of authenticity and tranquillity, this could well be the answer you have been searching for.
Discovering the charm of authentic rural Spain
There is something deeply appealing about discovering a place that has not been polished and packaged solely for the tourist trade. The countryside in Spain holds countless hidden corners where life continues at its own unhurried pace, where traditions remain intact and the landscape feels untouched by the relentless march of modernity. It is in these quieter regions that you can truly appreciate what rural Spain has to offer, from rolling fields to ancient stone buildings that have stood for generations. The experience is not about ticking off sights from a list but rather about slowing down and absorbing the rhythms of a different way of life.
What makes this countryside retreat stand out from typical holidays
Most holidays follow a predictable pattern, whether it is a seaside resort with all the usual amenities or a city break filled with museums and restaurants. This particular retreat takes a different approach entirely. Rather than offering the standardised comforts you might expect, it provides an opportunity to engage with the countryside in a more intimate and meaningful way. The setting encourages you to step outside your usual routine and embrace a simpler, more grounded existence, if only for a short while. It is the kind of place where you might find yourself spending an afternoon simply watching the landscape change with the light, or enjoying conversations that meander as lazily as the nearby streams.
The perfect antidote to London’s fast-paced lifestyle
Living in London means adapting to a certain tempo, one that can be exhilarating but also exhausting. The constant hum of traffic, the packed commutes, the endless demands on your time all contribute to a sense of perpetual motion. When you finally pause, you realise how much you crave stillness and space. A countryside escape offers exactly that. The contrast could not be sharper: instead of honking horns and crowded pavements, you find yourself surrounded by birdsong and open skies. The air feels different, cleaner somehow, and the absence of light pollution means the stars actually make an appearance at night. It is a reminder that there is a whole world beyond the boundaries of the capital, one that operates on a very different wavelength.
What awaits you at this distinctive rural destination

When you arrive at this rural haven, the first thing you notice is the sense of quiet. It is not an oppressive silence but rather a peaceful absence of noise that allows other sounds to come to the fore. You might hear the rustle of leaves, the distant bleat of sheep, or the creak of an old wooden gate. The landscape itself is a study in understated beauty, with fields that stretch into the distance and hills that rise gently against the horizon. The architecture reflects the history of the region, with buildings constructed from local stone that seem to grow organically from the earth. Everything feels connected and rooted in a way that is rare in modern life.
Experiencing genuine Spanish countryside living
One of the most rewarding aspects of this escape is the chance to experience rural Spanish life as it is actually lived, rather than as it is performed for visitors. If you are curious about this sort of authentic experience, you might want to check out ladehesilla.es to get a better sense of what awaits. The daily rhythms here follow the seasons and the land, with activities shaped by the natural environment rather than by schedules and deadlines. You might find yourself sampling food that has been grown or raised nearby, prepared in the traditional manner without fuss or pretension. Conversations with locals, if you are fortunate enough to strike them up, reveal a way of thinking that values patience, community, and a deep connection to place. It is a perspective that can feel almost revolutionary when you are used to the relentless pace of urban existence.
Practical details for planning your escape
Of course, the idea of a countryside retreat is only appealing if you can actually make it happen, and that means thinking through the practicalities. Getting to rural Spain from London is easier than you might imagine, with several airlines offering direct flights to nearby cities. From there, hiring a car gives you the freedom to explore at your own pace and reach destinations that are off the beaten track. Accommodation in these areas tends to be more affordable than in major tourist centres, and the value for money is often exceptional given the quality of the experience. It is worth planning your visit around the seasons, as each brings its own character to the countryside. Spring offers wildflowers and mild temperatures, summer brings long evenings and vibrant local festivals, autumn is harvest time with all its attendant richness, and winter has a stark beauty that can be equally captivating. Whatever time of year you choose, the key is to approach the experience with an open mind and a willingness to embrace a different pace of life, even if only temporarily.

by cafe-eilat | Apr 17, 2026 | Equipment
The culinary world has witnessed a remarkable surge in enthusiasm for a particular knife case championed by none other than Philippe Etchebest, a name synonymous with excellence in French gastronomy. This exceptional collection has captured the attention of both seasoned professionals and passionate home cooks, transforming the way people approach food preparation. The allure lies not merely in the association with a celebrated chef but in the thoughtful design and superior craftsmanship that characterise every element of this offering. As more cooking enthusiasts discover the difference that proper tools can make, this knife case has emerged as a standout choice for those seeking to elevate their kitchen experience.
The culinary heritage behind philippe etchebest's knife collection
From michelin-starred kitchens to home cooking excellence
Philippe Etchebest brings decades of experience from some of the most prestigious kitchens in France to this carefully curated knife collection. His journey through the world of fine dining has given him an intimate understanding of what truly matters when it comes to cutting tools. The transition from professional environments to home kitchens required a delicate balance, ensuring that the same standards of performance could be maintained without overwhelming those who cook for pleasure rather than profession. This background has informed every decision in the creation of the knife case, from the selection of blade materials to the weight distribution that makes prolonged use comfortable. The result is a collection that brings the rigour and precision of Michelin-starred establishments into domestic settings, allowing everyday cooks to work with the same confidence and efficiency as trained chefs.
What Sets Etchebest's Vision Apart in the Knife Market
The knife market is crowded with offerings from established brands such as Victorinox, ICEL, and Zwilling, each with their own legacy and loyal following. What distinguishes the Etchebest collection is the focus on accessibility without compromise. Rather than simply endorsing existing products, the collection reflects a genuine commitment to democratising professional-grade tools. This approach acknowledges that passionate home cooks deserve the same quality of equipment that professionals rely upon daily. The vision extends beyond individual blades to encompass the entire experience of owning and using these knives. From the moment the case is opened, users encounter a level of attention to detail that speaks to the chef's personal standards. This philosophy has resonated strongly with those who view cooking not as a chore but as a creative pursuit worthy of investment in proper tools.
Craftsmanship and quality that transforms everyday cooking
Premium Materials and Precision Engineering in Each Blade
The foundation of any exceptional knife lies in the materials from which it is forged. The Etchebest collection features blades crafted from high-carbon stainless steel, a material prized for its ability to retain sharpness over extended periods whilst resisting corrosion. This composition ensures that the cutting edge remains reliably keen, reducing the frequency of sharpening and maintaining consistent performance. The precision engineering evident in each blade demonstrates a commitment to excellence that extends to every aspect of construction. Weight distribution has been carefully considered to minimise hand fatigue during prolonged use, whilst the balance point allows for intuitive control during delicate tasks. The ergonomic design of the handles reflects an understanding that comfort directly influences both safety and precision. These elements combine to create tools that feel like natural extensions of the hand, enabling users to work with confidence and accuracy. The range includes essential varieties such as chef knives, slicing knives, and bread knives, ensuring comprehensive coverage of common kitchen tasks.

Why professional chefs and home cooks alike trust these knives
Trust in kitchen equipment develops through consistent performance under diverse conditions. Professional chefs working in demanding commercial environments have embraced this collection because it meets the exacting standards they require for fast and efficient food preparation. The ability to make clean, precise cuts influences not only the speed of work but also the final presentation and flavour of dishes. For home cooks, the benefits are equally significant. A sharp blade requires less pressure to cut through ingredients, which translates directly into improved safety. The reduced force needed means less chance of the knife slipping and causing injury, a consideration that becomes particularly important for those who may not have formal culinary training. The proper storage solutions included with the case help prevent damage and dulling, ensuring that the knives remain in optimal condition between uses. This attention to maintenance extends the lifespan of the tools whilst preserving their performance characteristics. The combination of professional-grade quality and thoughtful design creates an experience that builds confidence in the kitchen, encouraging users to attempt more ambitious culinary projects.
The perfect gift for anyone passionate about food preparation
Thoughtful presentation that matches the quality within
The presentation of a gift speaks volumes about the thought and care invested in its selection. The Etchebest knife case arrives in packaging that reflects the premium nature of its contents, creating an immediate impression of quality and consideration. Opening the case reveals knives displayed with the care typically reserved for precious items, each blade secured in its designated position. This arrangement not only protects the knives during transport but also creates a visual impact that enhances the gifting experience. For those who appreciate cooking, receiving such a collection represents recognition of their passion and an investment in their continued growth. The case itself becomes a permanent fixture in the kitchen, serving both practical storage needs and acting as a constant reminder of the occasion and the person who gave it. This dual function elevates the gift beyond mere utility into the realm of meaningful gesture. The comprehensive nature of the collection means recipients have access to the essential tools needed for virtually any culinary task, eliminating the need to gradually assemble equipment over time.
How This Knife Case Inspires Confidence in the Kitchen
Confidence in the kitchen stems from having the right tools and knowing they will perform reliably when needed. The Etchebest knife case provides this assurance through its combination of quality construction and thoughtful design. Users find themselves approaching food preparation with renewed enthusiasm, eager to explore techniques that might have seemed daunting with inferior equipment. The precision afforded by sharp, well-balanced blades transforms routine tasks into opportunities for creativity and skill development. This psychological shift is perhaps one of the most valuable aspects of owning professional-grade equipment. When cooks trust their tools, they can focus entirely on the creative and sensory aspects of preparing food rather than struggling with inadequate implements. The ergonomic considerations built into each knife reduce physical strain, allowing for longer sessions of preparation without discomfort. This becomes particularly important for those who enjoy entertaining or preparing elaborate meals that require extensive chopping, slicing, and dicing. The age verification requirement for bladed products ensures that these tools reach only those mature enough to handle them responsibly, adding an element of exclusivity to the purchase. For cooking enthusiasts, this knife case represents not just a collection of tools but an invitation to pursue their passion with the same seriousness and dedication as professional chefs, making it an ideal present that will be cherished and used for years to come.
by cafe-eilat | Apr 17, 2026 | Recipes
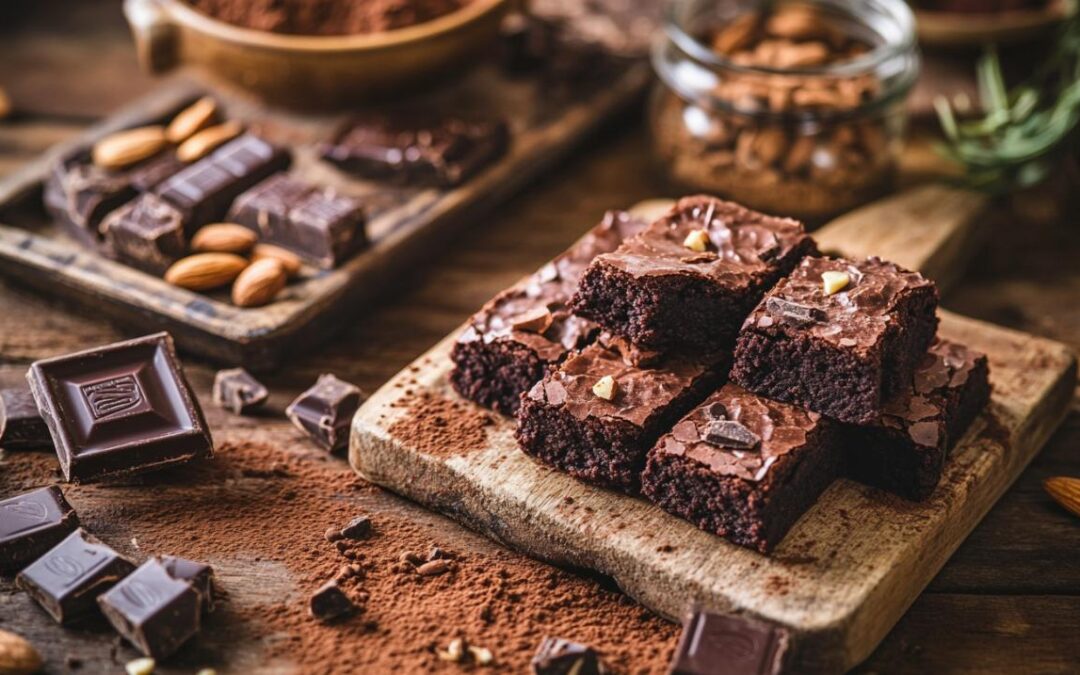
For those who embrace gluten-free baking, the humble box mix has long been a convenient ally, offering a swift route to satisfying chocolate treats. Yet beneath the simplicity of pre-packaged ingredients lies a remarkable opportunity for transformation. With just a handful of thoughtful additions and a touch of baking intuition, that standard box of gluten-free brownie mix can evolve into a luxurious, deeply flavoured indulgence that rivals any artisanal creation. Whether you are catering to dietary requirements or simply seeking to elevate your home baking, understanding how to enrich a basic mix with premium ingredients such as dark chocolate, carefully chosen nuts, and even a pinch of bicarbonate of soda can unlock a world of texture, depth, and sophisticated flavour.
Transforming your gluten-free box mix: essential ingredient upgrades
The foundation of any truly memorable brownie lies in the quality of the chocolate itself. When working with a gluten-free brownie mix, consider supplementing the existing cocoa powder with additional melted chocolate, preferably one with a high cocoa content. Dark chocolate, ideally between seventy and eighty-five percent cocoa solids, brings a bittersweet complexity that cuts through the sweetness of caster sugar and adds a fudgy richness that is often absent in standard mixes. By melting approximately one hundred and twenty-five grams of premium dark chocolate and stirring it into your batter, you introduce both moisture and an intensified chocolate flavour that transforms the final result. This addition is particularly effective when combined with a modest quantity of cocoa powder, which reinforces the deep, earthy notes without overwhelming the palate.
Selecting Premium Dark Chocolate and Cocoa for Richer Flavour
When choosing your chocolate, opt for varieties free from unnecessary additives and with a clear cocoa percentage listed on the wrapper. A bar containing natural cocoa butter, rather than vegetable fats, will yield a silkier texture and a more pronounced chocolate aroma. Some enthusiasts prefer to fold in chocolate chips midway through mixing, allowing pockets of molten chocolate to emerge in the finished brownies. This technique, popular among food bloggers and recipe book authors alike, creates a delightful contrast between the dense crumb and the glossy, semi-liquid chocolate veins. Furthermore, supplementing the mix with an extra tablespoon of high-quality cocoa powder can deepen the colour and intensify the flavour, particularly if the box mix errs on the lighter side. This is a simple yet effective method to achieve that coveted fudgy consistency and rich, black appearance that signals indulgence.
Incorporating nuts: choosing between pecan, almond and walnut varieties
Nuts bring both textural contrast and a nutty, buttery dimension that complements the sweetness of a brownie beautifully. Pecans, with their delicate, almost caramel-like sweetness, are an excellent choice for those who prefer a milder nut flavour. Roughly chop around eighty grams of pecan halves and fold them gently into the batter just before transferring it to the baking tin. Almonds, on the other hand, offer a firmer bite and a subtle marzipan note, which pairs exceptionally well with dark chocolate. For a more robust, earthy flavour, walnuts are hard to beat. Their slightly bitter edge balances the sugar content and adds a sophisticated complexity that appeals to more discerning palates. Toasting the nuts lightly in a dry pan before adding them to the mix can further enhance their flavour, releasing aromatic oils and deepening their colour. This small step can make a significant difference to the overall sensory experience of your gluten-free brownies.
Mastering the Chemistry: Bicarbonate of Soda, Baking Powder and Egg Techniques
Gluten-free baking presents unique challenges, particularly when it comes to achieving the desired texture and rise. Traditional wheat flour contains gluten, which provides structure and elasticity. In its absence, adjustments to leavening agents become crucial. Many gluten-free brownie mixes include baking powder, but a judicious addition of bicarbonate of soda can further enhance the texture, particularly if your batter includes an acidic component such as cocoa powder or a dairy-free yogurt. Bicarbonate of soda, or sodium bicarbonate, reacts with acid to produce carbon dioxide, which creates small pockets of air within the batter, leading to a lighter, more tender crumb. However, it is essential to use it sparingly; a quarter of a teaspoon is often sufficient to avoid an overly alkaline aftertaste.

Understanding How Bicarbonate of Soda Enhances Texture in Gluten-Free Baking
The role of bicarbonate of soda extends beyond simple leavening. In gluten-free baking, it can also aid in the Maillard reaction, which contributes to the browning and development of complex flavours during cooking. This is particularly beneficial when working with a gluten-free flour blend, which may lack the natural depth of wheat. When combined with eggs, butter, and chocolate, a small amount of bicarbonate of soda helps to create that characteristic crackly top and moist interior that define a truly fudgy brownie. It is worth noting that if your box mix already contains baking powder, the addition of bicarbonate of soda should be minimal to avoid excessive rise, which can lead to a cakey rather than fudgy texture. For those who prefer a denser, more indulgent brownie, reducing the quantity of both leavening agents is advisable.
Adjusting egg ratios and exploring dairy-free, vegan alternatives
Eggs serve multiple functions in brownie batter, acting as a binder, a source of moisture, and a leavening agent. Most recipes call for medium eggs, typically three or four, but the precise number can vary depending on the size of your tin and your desired consistency. If you seek a richer, more custard-like centre, consider adding an extra egg yolk, which increases the fat content and contributes to a glossy, fudgy finish. For those following a vegan or dairy-free diet, several alternatives exist. Flax eggs, made by mixing ground flaxseed with water, offer a mild binding quality, though they may yield a slightly denser result. Chia seeds can be used similarly, providing additional fibre and a subtle nutty flavour. Commercial egg replacers, often based on potato starch or tapioca, are another option, though they may require some experimentation to achieve the ideal texture. When replacing eggs, it is also important to consider the impact on baking time, as vegan batters can sometimes require a few extra minutes to set fully.
Preparation, Baking Tin Selection and Cooking Times for Perfect Results
Successful baking begins long before the oven is switched on. Proper preparation and attention to detail can mean the difference between a batch of disappointing brownies and a tray of perfectly cooked, indulgent treats. Start by selecting a suitable baking tin; a twenty-centimetre square tin is ideal for most recipes, providing a depth that allows the brownies to cook evenly while maintaining a fudgy centre. Grease the tin thoroughly with butter or a dairy-free alternative, then line it with baking parchment, allowing the edges to overhang slightly. This simple step facilitates easy removal once the brownies have cooled and prevents any sticking, which can mar the surface and compromise the texture.
Proper Mixing Methods and Preparing Your Baking Tin for Gluten-Free Brownies
When combining your ingredients, the order and method of mixing are crucial. Begin by melting the chocolate and butter together, either in a microwave-safe bowl or over a gentle bain-marie. Allow this mixture to cool slightly before whisking in the sugar, as excessive heat can cause the eggs to scramble when they are added. Once the sugar is fully incorporated, beat in the eggs one at a time, ensuring each is fully blended before adding the next. This gradual approach helps to create a smooth, homogeneous batter with a glossy sheen. Next, sift together the gluten-free flour, cocoa powder, and any additional bicarbonate of soda, then gently fold these dry ingredients into the wet mixture using a spatula. Avoid over-mixing, as this can lead to a tougher texture, particularly in gluten-free batters, which are more delicate than their wheat-based counterparts. If you are adding chocolate chips or nuts, fold them in at the end, distributing them evenly throughout the batter to ensure every slice delivers a balanced mouthful.
Optimal Temperature Settings and Cooking Times for Fudgy Chocolate Brownies
Baking temperature and time are critical variables that directly influence the final texture of your brownies. Most gluten-free brownie recipes recommend a moderate oven temperature, typically between one hundred and sixty and one hundred and eighty degrees Celsius, with fan ovens often requiring a reduction of ten to twenty degrees. Preheat your oven thoroughly to ensure even heat distribution from the outset. A total cooking time of thirty to thirty-eight minutes is generally sufficient, though this can vary depending on your oven and the depth of your batter. For a truly fudgy result, err on the side of caution and begin checking for doneness at the thirty-minute mark. Insert a skewer into the centre; it should emerge with a few moist crumbs clinging to it, rather than being completely clean. Remember that brownies continue to cook slightly after being removed from the oven, so a slight underbake is preferable to an overbake. Once out of the oven, allow the brownies to cool in the tin for at least fifteen minutes before lifting them out using the parchment overhang. For the best flavour and texture, let them cool completely before slicing, though this can be a test of patience. Properly cooled brownies will hold their shape better and deliver a cleaner cut. Should you wish to store them, an airtight container will keep them fresh for up to seven days, while freezing is an excellent option for extending their life for two to three months. When reheating from frozen, a brief spell in the microwave or a gentle warming in a low oven can restore that just-baked indulgence, making it easy to enjoy a luxurious treat at a moment's notice.

by cafe-eilat | Apr 14, 2026 | Equipment
A morning coffee ritual can quickly turn frustrating when your beloved Nespresso machine starts leaving puddles on the worktop. These unexpected leaks not only create a mess but can also signal underlying issues that need attention. Understanding the root causes of these drips and knowing how to address them effectively can restore your machine to its former glory and ensure your daily caffeine fix remains uninterrupted. Whether your machine is actively brewing or sitting idle, identifying the source of the problem is the first step towards a solution.
Common culprits behind your nespresso's unwanted drips
One of the most frequent reasons for a leaking brewing machine involves the timing and circumstances of the leak itself. Observing whether the leak occurs during the brewing process or when the machine is switched off provides valuable clues about what might be going wrong. If water pools around the base while the machine is idle, the issue may differ significantly from leaks that appear during active use. This distinction helps narrow down the potential causes and guides you towards the appropriate fix.
Worn or Damaged Seals and Gaskets
Over time, the seals and gaskets within your Nespresso machine can deteriorate due to regular use and exposure to heat and moisture. These small but crucial components ensure that water flows through the correct channels without escaping. When they become worn, cracked, or misaligned, water can find alternative paths, resulting in leaks. The water tank valve, for instance, must close properly to prevent unwanted drips. If this valve fails to seal correctly, water may seep out even when the machine is not in use. Similarly, ensuring that the water tank is properly attached to the machine is essential, as a loose or improperly fitted tank can lead to leaks at the connection point. Checking these seals regularly and replacing them when necessary can prevent many common leaking issues.
Blocked water lines and limescale build-up
Hard water contains minerals that accumulate inside your brewing machine over time, forming limescale deposits. These deposits can obstruct water lines and interfere with the normal flow of water through the system. When water cannot pass through freely, it may back up and leak from unexpected areas. Additionally, blockages can increase internal pressure, causing seals to fail or water to escape through joints and connections. Placing the water tank on a dry surface can help determine if the tank itself is leaking or if the issue lies within the machine. Regular maintenance, including descaling, is crucial to prevent limescale build-up and maintain the integrity of the water lines. Ignoring this issue not only leads to leaks but can also affect the quality of your coffee and the overall lifespan of your machine.
Simple solutions to fix your leaking nespresso machine
Once you have identified the likely cause of the leak, implementing the right solution becomes straightforward. Many leaks can be resolved with simple cleaning and maintenance tasks that do not require professional assistance. However, in some cases, replacing worn parts may be necessary to fully restore your machine's function. Taking a methodical approach ensures that you address the root cause rather than merely treating the symptoms.

Cleaning and descaling your machine properly
Regular cleaning is one of the most effective ways to prevent and resolve leaks. Start by emptying the capsule container regularly, as a full container can cause overflow and contribute to leaks. Next, perform a thorough descaling of your machine using a suitable descaling solution. This process removes limescale deposits from the internal water lines and components, restoring normal water flow and reducing the risk of leaks. Follow the manufacturer's instructions carefully when descaling, as improper use of descaling agents can damage the machine. Additionally, wipe down the exterior and clean the drip tray to prevent residue build-up that might interfere with the machine's operation. Keeping the water tank clean and checking that it is properly attached to the machine can also prevent leaks at the connection point. For guidance on cleaning and descaling, the Nespresso website offers comprehensive resources in the machine assistance section.
Replacing faulty parts and seals
If cleaning and descaling do not resolve the leak, the issue may lie with worn or damaged parts. Seals, gaskets, and valves can degrade over time and require replacement to restore a watertight seal. Inspect the tank valve to ensure it closes properly, as a faulty valve is a common source of leaks. If you notice visible damage or wear on any seals, consider ordering replacement parts from the manufacturer or an authorised supplier. In some cases, the machine attachment points may also need attention, particularly if the water tank does not fit securely. Replacing these small components is often simple and cost-effective, and it can significantly extend the life of your machine. Should you encounter difficulties or need assistance identifying the correct parts, customer support is available to help. You can contact them by email or ring their freephone number on 800 39 20 29, any time, any day, for personalised machine assistance.
Preventing future leaks: maintenance tips for your nespresso
Prevention is always better than cure, and establishing a regular maintenance routine can save you from the inconvenience of dealing with leaks in the future. By adopting best practices for the care of your brewing machine, you can ensure consistent performance and extend its operational lifespan. Simple habits, when maintained consistently, make a significant difference in the long-term health of your appliance.
Regular cleaning routines to keep your machine healthy
Incorporating routine cleaning into your coffee-making schedule is essential for leak detection and prevention. After each use, empty the capsule container and rinse the drip tray to prevent residue build-up. Weekly, remove the water tank and clean it thoroughly with warm, soapy water, ensuring that the tank valve and machine attachment points are free from debris. Monthly, perform a descaling cycle to eliminate limescale deposits that could block water lines and cause leaks. These simple steps help maintain the integrity of seals and gaskets, reducing the likelihood of wear and tear. Additionally, checking for visible signs of damage or wear during each cleaning session allows you to address potential issues before they escalate into significant problems. By staying vigilant and proactive, you can keep your Nespresso machine running smoothly and leak-free.
Best Practices for Long-Term Care and Performance
Beyond regular cleaning, adopting best practices for the overall care of your machine contributes to its longevity and reliability. Always use filtered or bottled water if your local supply is particularly hard, as this reduces limescale accumulation. Ensure that the water tank is securely attached before each use and that the tank valve is functioning correctly. Avoid overfilling the tank, as excess water can lead to spills and leaks. Store your machine in a dry, stable environment away from direct sunlight and heat sources, which can accelerate the degradation of seals and plastic components. If you plan to store the machine for an extended period, drain all water from the system and clean it thoroughly to prevent mould and mineral build-up. Should you need further advice or wish to update your contact preferences for machine assistance, you can manage your account settings on the Nespresso website, ensuring you receive timely updates and support. Users can change or keep their contact preferences, with changing preferences redirecting to the My Account Contact Preferences section and keeping preferences confirming the current settings. By following these guidelines, you can enjoy a reliable, leak-free brewing experience for years to come.
by cafe-eilat | Apr 14, 2026 | Cooking techniques
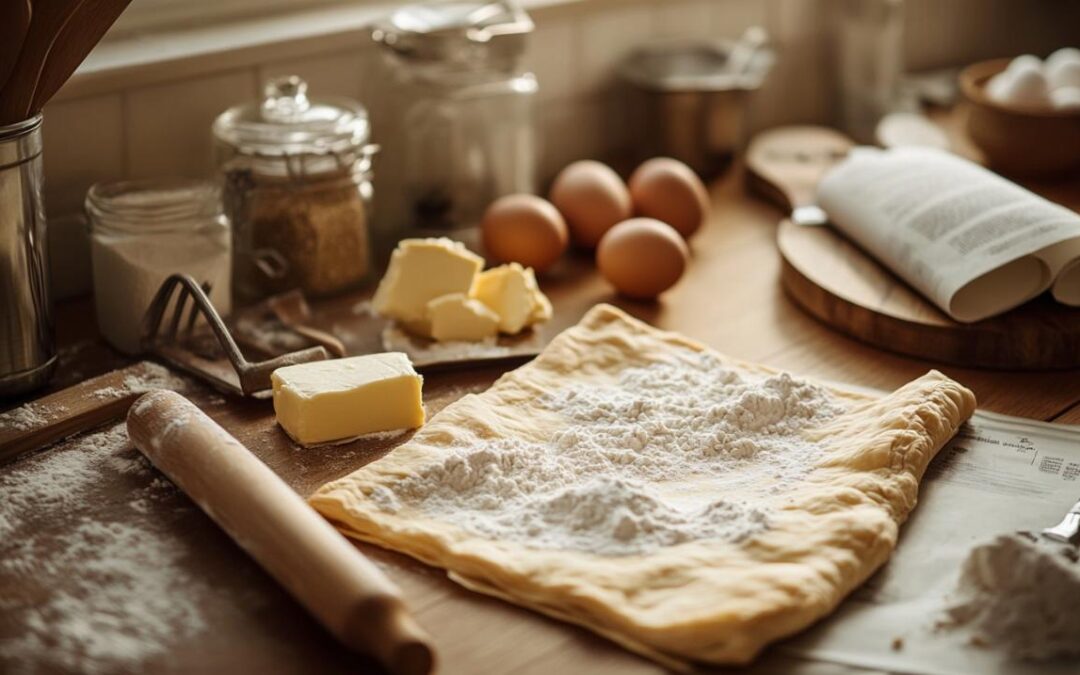
Discovering a forgotten packet of puff pastry lurking at the back of your fridge can stir mixed emotions. On one hand, the prospect of creating delicious savoury treats or sweet indulgences feels thrilling. On the other, that small printed date on the packaging raises a question mark about safety and quality. Navigating the fine line between culinary creativity and food safety requires a clear understanding of what that date truly signifies and how proper storage practices can extend the life of this versatile ingredient.
Assessing puff pastry safety after the use-by date
When puff pastry surpasses its printed use-by date, it does not automatically transform into something hazardous. The date serves as a manufacturer's guideline for optimal quality rather than an absolute cutoff for edibility. However, the decision to use pastry beyond this point hinges on careful examination and proper storage history. Understanding how to evaluate the condition of your pastry can help you make informed choices that balance safety with reducing unnecessary waste.
Visual and Sensory Checks: What to Look For
The first step in determining whether your puff pastry remains suitable for baking involves engaging your senses. Begin by unwrapping the pastry and observing its appearance. Fresh puff pastry typically presents a pale, even colour without dark spots or discolouration. Any patches of mould, unusual staining, or slimy texture signal that the product has begun to deteriorate and should be discarded immediately. The smell test proves equally crucial. A neutral or faintly buttery aroma indicates the pastry remains in good condition, whereas sour, rancid, or otherwise unpleasant odours suggest spoilage has set in. Texture offers another clue. Quality puff pastry feels slightly cool to the touch and maintains a firm yet pliable consistency. If the pastry appears excessively dry, crumbly, or conversely too sticky, its baking performance may suffer even if it remains technically safe to consume.
Storage conditions that extend puff pastry freshness
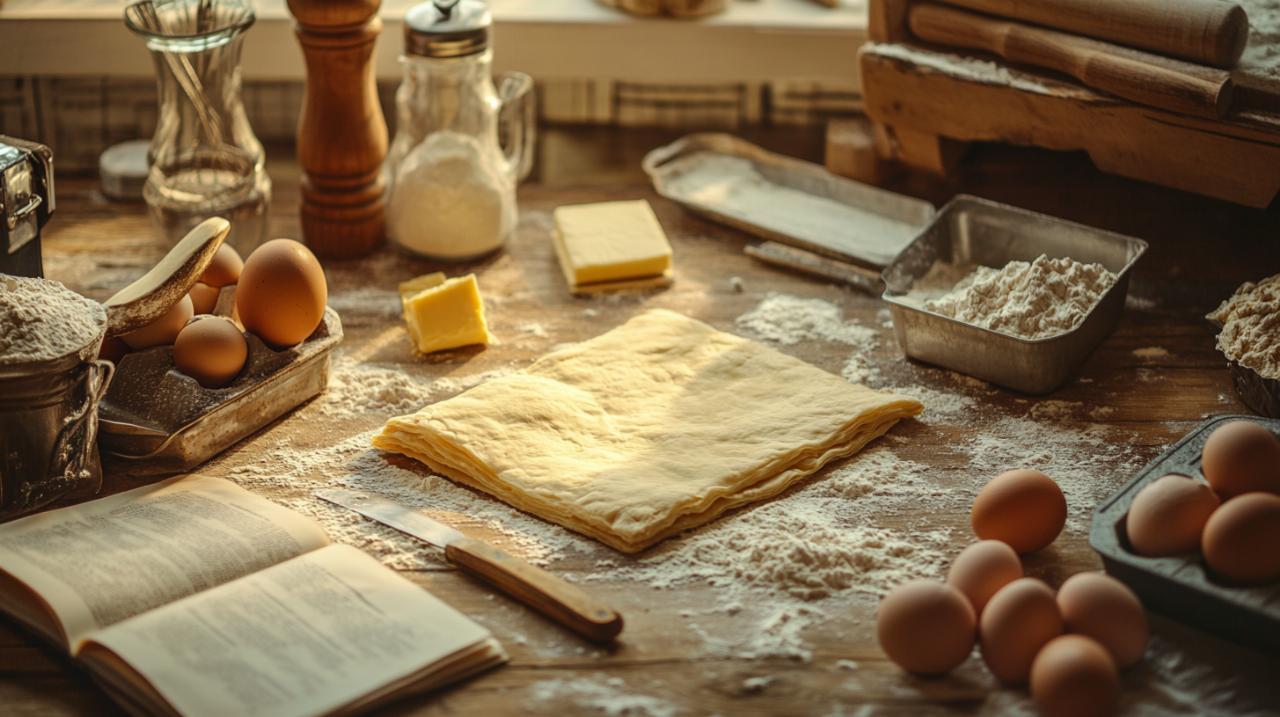
How you store puff pastry dramatically influences its longevity and safety profile. Refrigeration provides short-term preservation, typically extending usability for a couple of days beyond the use-by date if the pastry has been kept at a consistent, cold temperature. For longer-term storage, freezing emerges as the champion solution. Wrapped tightly in cling film to prevent freezer burn, frozen puff pastry can maintain its best quality for ten to twelve months. Frozen raw pastry with filling generally retains optimal characteristics for nine to twelve months, whilst par-baked filled pastries hold their quality for six to eight months. When the time comes to use frozen pastry, patience becomes essential. Thawing should occur gradually in the fridge rather than at room temperature, preserving the delicate layered structure that gives puff pastry its signature rise and flakiness. Proper wrapping and controlled thawing protect the butter layers from becoming separated or compromised, ensuring your baked creations achieve that coveted golden, crisp finish.
Understanding the risks: when expired puff pastry should be discarded
Whilst puff pastry often remains usable shortly after its printed date, certain conditions demand immediate disposal. Recognising these warning signs protects you and your loved ones from potential foodborne illness whilst also clarifying when caution tips into genuine risk.
Signs of spoilage you must not ignore
Several unmistakable indicators reveal when puff pastry has crossed the threshold from merely aged to genuinely unsafe. Visible mould growth, whether appearing as fuzzy patches or discoloured spots, represents an absolute red flag. Mould can penetrate deeper into the pastry than what appears on the surface, making it impossible to salvage the product by simply trimming affected areas. A rancid or sour odour emanating from the pastry signals that fats within the butter layers have oxidised, producing compounds that can cause digestive discomfort and unpleasant flavours. Similarly, any slimy film or sticky residue on the pastry surface indicates bacterial activity that renders the product unsafe. Changes in packaging integrity also matter. If the wrapper appears torn, bloated, or compromised in any way, external contaminants may have infiltrated the pastry, increasing spoilage risk regardless of the printed date.
Food safety guidelines for pastry products
Food safety authorities emphasise that use-by dates on chilled products like puff pastry reflect microbiological safety considerations rather than mere quality markers. Unlike best-before dates, which primarily address taste and texture, use-by dates indicate the period during which the manufacturer guarantees the product remains safe under proper storage conditions. Once this date passes, the risk of bacterial proliferation increases, particularly if the pastry has experienced temperature fluctuations or prolonged exposure to warmer conditions. Pregnant individuals, young children, elderly persons, and those with compromised immune systems face heightened vulnerability to foodborne pathogens and should exercise additional caution. For these groups, adhering strictly to use-by dates offers the safest approach. Even when visual and sensory checks suggest the pastry appears fine, the invisible presence of harmful bacteria cannot be ruled out once the safety window has closed. Balancing waste reduction with health protection requires honest assessment of both the product's condition and the consumer's individual risk factors.
Reducing food waste: creative recipe ideas to use puff pastry before it expires
The most effective strategy for avoiding the dilemma of expired puff pastry involves using it whilst still fresh. Fortunately, this versatile ingredient lends itself to countless quick and easy preparations that transform simple pantry staples into impressive dishes. Whether your palate craves savoury satisfaction or sweet indulgence, puff pastry accommodates both with minimal effort.
Quick savoury bites and elegant canapés
Savoury applications showcase puff pastry's ability to elevate humble ingredients into crowd-pleasing creations. Cheese and onion pasties require just fortyfive minutes from start to finish, combining four hundred and fifty grams of pastry with everyday vegetables and cheese for a satisfying meal. Sausage rolls remain a perennial favourite, with traditional versions needing three hundred and twenty grams of pastry for four generous portions. For those preferring plant-based options, vegan sausage rolls utilise six hundred and forty grams of pastry and seventyfive minutes of cooking time to produce eight delicious rolls that satisfy herbivores and omnivores alike. Sesame puff pastry breadsticks offer an even simpler approach, transforming pastry scraps into crispy accompaniments for soups or dips. Ham and cheese pastries combine protein and dairy in golden parcels that work equally well for brunch, lunch, or casual entertaining. Puff pastry braids filled with red pesto demonstrate how a single flavourful ingredient can create visual impact alongside delicious taste. For those seeking international flair, salty New York rolls stuffed with pesto bring cosmopolitan sophistication to your table. These savoury preparations accommodate batch cooking beautifully, allowing you to freeze finished products for convenient future meals whilst preventing pastry waste.
Sweet Treats and Breakfast Pastries to Make at Home
Sweet applications reveal puff pastry's chameleon-like ability to adapt to dessert and breakfast contexts. Easy chocolate Danish requires merely twenty minutes and three hundred and seventy-five grams of pastry to produce sixteen servings of indulgent morning treats. Pastel de Nata, those iconic Portuguese custard tarts, need three hundred and twenty grams of pastry to create twelve portions of creamy, caramelised perfection. Custard slices demand just fifteen minutes of preparation time and three hundred and twenty grams of pastry for eight generous servings. Apple puffs transform seasonal fruit into elegant individual desserts, whilst puff pastry hearts filled with Nutella deliver chocolate satisfaction in charming shapes that appeal to children and adults alike. Simple and quick palmiers demonstrate how sugar and pastry alone can create sophisticated biscuits through clever shaping and caramelisation. Mini ham croissants blur the line between sweet and savoury, offering versatility for different occasions. These sweet recipes particularly benefit from involving young family members in the baking process, turning pastry rescue into quality time and skill-building opportunities. The forgiving nature of puff pastry tolerates gentle re-rolling, meaning even imperfect shapes yield delicious results. Some adventurous bakers even repurpose puff pastry as a pizza base, creating a hybrid that marries Italian tradition with French technique, though purists note the structural differences between yeast-leavened pizza dough and butter-layered puff pastry produce distinct textures and flavours.

by cafe-eilat | Apr 14, 2026 | Cooking techniques
Mastering the art of creating perfect emulsions transforms ordinary home cooking into an extraordinary culinary experience. These stable mixtures, which bring together two liquids that naturally resist combining, form the foundation of countless beloved sauces and dressings. From the creamy richness of mayonnaise to the delicate balance of a classic vinaigrette, understanding how to coax oil and water into harmonious union opens up a world of flavour possibilities. Whether you are an enthusiastic novice or a seasoned cook looking to refine your technique, achieving that ideal smooth, homogenous consistency requires both knowledge and practice. The good news is that with the right approach and a bit of patience, anyone can master this essential kitchen skill.
Understanding the science behind emulsions
At the heart of every successful emulsion lies a fascinating battle against nature. The very essence of these mixtures involves convincing two stubborn liquids to cooperate when their molecular structure tells them to do quite the opposite. Grasping the underlying science not only demystifies the process but also empowers you to troubleshoot when things go awry. For those eager to expand their culinary repertoire and explore more advanced techniques, we invite you to visit our cuisine section where detailed guides await. The journey from understanding why liquids separate to creating silky smooth sauces is both intellectually rewarding and practically invaluable in the kitchen.
What makes oil and water incompatible
The age-old saying that oil and water do not mix holds profound scientific truth rooted in molecular chemistry. Water molecules possess a polar structure, meaning they carry both positive and negative charges that attract one another, forming strong bonds. Oil molecules, conversely, are nonpolar and lack these charged regions, preferring instead to cluster together and exclude water. This fundamental difference in molecular architecture creates what scientists call surface tension, an invisible barrier that prevents the two liquids from integrating. When you pour oil into water, the oil naturally floats and forms distinct globules, stubbornly refusing to disperse. This incompatibility presents the central challenge in emulsion creation, as the cook must find a way to overcome these powerful natural forces and persuade the liquids to remain suspended together in a stable, creamy mixture.
The Role of Emulsifiers in Stabilising Mixtures
Emulsifiers serve as the peacemakers in this molecular standoff, possessing unique structures that allow them to bridge the gap between oil and water. These remarkable compounds feature both hydrophilic regions, which love water, and hydrophobic regions, which prefer oil. When introduced into a mixture, emulsifier molecules position themselves at the boundary between oil droplets and the surrounding water, effectively reducing surface tension and preventing separation. Lecithin, discovered by Théodore Nicolas Gobley in eighteen seventy-four, remains one of the most powerful natural emulsifiers found abundantly in egg yolks and soybeans. Beyond lecithin, mucilage present in mustard, flaxseed, and chia seeds offers excellent stabilising properties, whilst casein from milk products also contributes to emulsion formation. These ingredients work tirelessly to keep oil droplets dispersed throughout the water phase, creating that coveted smooth texture. Different types of emulsions exist depending on their stability: temporary emulsions like vinaigrette separate quickly and require vigorous shaking before use, semi-permanent varieties such as beurre blanc and hollandaise last longer but remain fragile and sensitive to temperature changes, whilst permanent emulsions including mayonnaise and milk maintain their creamy, blended state almost indefinitely when properly prepared.
Essential techniques for achieving stable emulsions

Success in creating emulsions depends not merely on understanding the theory but on executing precise techniques with care and attention. The physical process of bringing together reluctant ingredients demands both patience and consistency, as rushing through the steps often leads to disappointing results. Many enthusiastic home cooks experience initial failures, but these setbacks serve as valuable learning opportunities that refine your touch and timing. Having the proper equipment at hand makes an enormous difference, with simple tools like jars for shaking, blenders for speed, and whisks for control each playing specific roles depending on the emulsion type you are creating. It may take several attempts to develop the feel for proper technique, so maintaining realistic expectations and perhaps keeping a store-bought version as backup ensures you are never left without a suitable sauce when entertaining.
Proper whisking methods and speed control
The mechanical action of whisking serves as the driving force that breaks oil into tiny droplets and disperses them throughout the water phase. Vigorous, consistent whisking creates the turbulence necessary to overcome surface tension and achieve initial mixing, but the speed and intensity must be carefully calibrated to the specific emulsion you are creating. For delicate preparations like hollandaise, excessive speed can introduce too much air or generate heat through friction, potentially causing the sauce to break. Conversely, insufficient whisking energy leaves oil droplets too large and unstable, leading to rapid separation. The ideal approach involves establishing a steady, rhythmic motion that thoroughly incorporates each addition without creating destructive force. When using a whisk by hand, positioning your bowl on a damp towel prevents slipping and allows you to focus entirely on maintaining consistent speed. Electric mixers and blenders offer speed advantages but require careful monitoring to avoid overworking the mixture, which can sometimes reverse the emulsion or create an unpleasantly aerated texture.
The art of gradual liquid introduction
Perhaps the most critical factor separating success from failure lies in how slowly and steadily you introduce the oil phase into the water and emulsifier mixture. Adding oil too quickly ranks among the most common mistakes, overwhelming the emulsifier's capacity to stabilise new droplets before they have a chance to properly disperse. The classic technique involves adding oil in an almost imperceptible drizzle, literally drop by drop at the beginning, whilst maintaining constant whisking motion. This painstaking approach allows each tiny amount of oil to be thoroughly broken down and coated with emulsifier before more is introduced. As the emulsion begins to thicken and stabilise, you can gradually increase the flow rate, but patience during those initial moments proves essential. Temperature control also plays a vital role, particularly with semi-permanent emulsions that rely on gentle heat. Overheating causes proteins to coagulate or fats to separate, instantly breaking the careful balance you have worked to establish. Following recipes with precision, measuring ingredients accurately, and resisting the temptation to rush ensures that your efforts result in beautifully smooth, stable sauces that showcase your growing mastery of this fundamental culinary technique.